SOORA ERP User Documentation
Complete guide to managing your business with the SOORA ERP system — users, permissions, products, orders, payments, SMS, Telebirr, reports and more.
1 Getting Started
What is SOORA ERP?
SOORA ERP is a web-based business management system built for retail and service businesses in Ethiopia. It helps you run your whole operation in one place: manage your team and their permissions, build a product catalog, record sales orders, accept cash and Telebirr payments, send SMS receipts to customers, and track your income with reports.
The system is designed to be simple enough for everyday staff while giving owners full control with powerful reports and configurable settings.
User Management
Create accounts and control what each staff member can do.
Product Catalog
Products, brands, categories, stores and attributes.
Orders & Payments
Private and organization orders with cash, transfer and Telebirr.
SMS Notifications
Automatic SMS to customers about orders and payments.
Reports & Analytics
Charts and detailed income reports by date.
Company Settings
Your brand, VAT, service charge, printer and SMS settings.
Who is this system for?
SOORA ERP is built for any business that records orders every day and needs to know exactly where its money is — from one counter to many stores. It is especially made for businesses that use orders and order processing from start to finish.
Shops
Supermarkets, mini-marts, stationery, clothing and everyday shops that sell and record orders daily.
Warehouses
Businesses that move stock in and out — stock counts, quantities, and knowing what is running low.
Printing Houses
Printing and design studios that take orders for measured materials and track every print job.
Photography Studios
Photography and photo studios that book sessions, sell prints, and follow up with their customers.
Businesses that Use Orders
Any business that takes an order, sells on credit, prints a receipt, or checks on what customers still owe.
System Requirements
| Requirement | Detail |
|---|---|
| PHP | Version 5.6 or newer (works from 5.3.7, but newer is recommended for security). |
| Web Server | Apache (via WAMP, XAMPP, LAMP or MAMP). |
| Database | MySQL / MariaDB. Database name: stock |
| Browsers | Chrome, Firefox, Edge or Safari (recent versions). |
| Internet | Required for SMS (GeeSMS API) and Telebirr payment verification. |
Installation Guide
- Download the files. Copy the project folder into your web server's root directory. For XAMPP this is usually
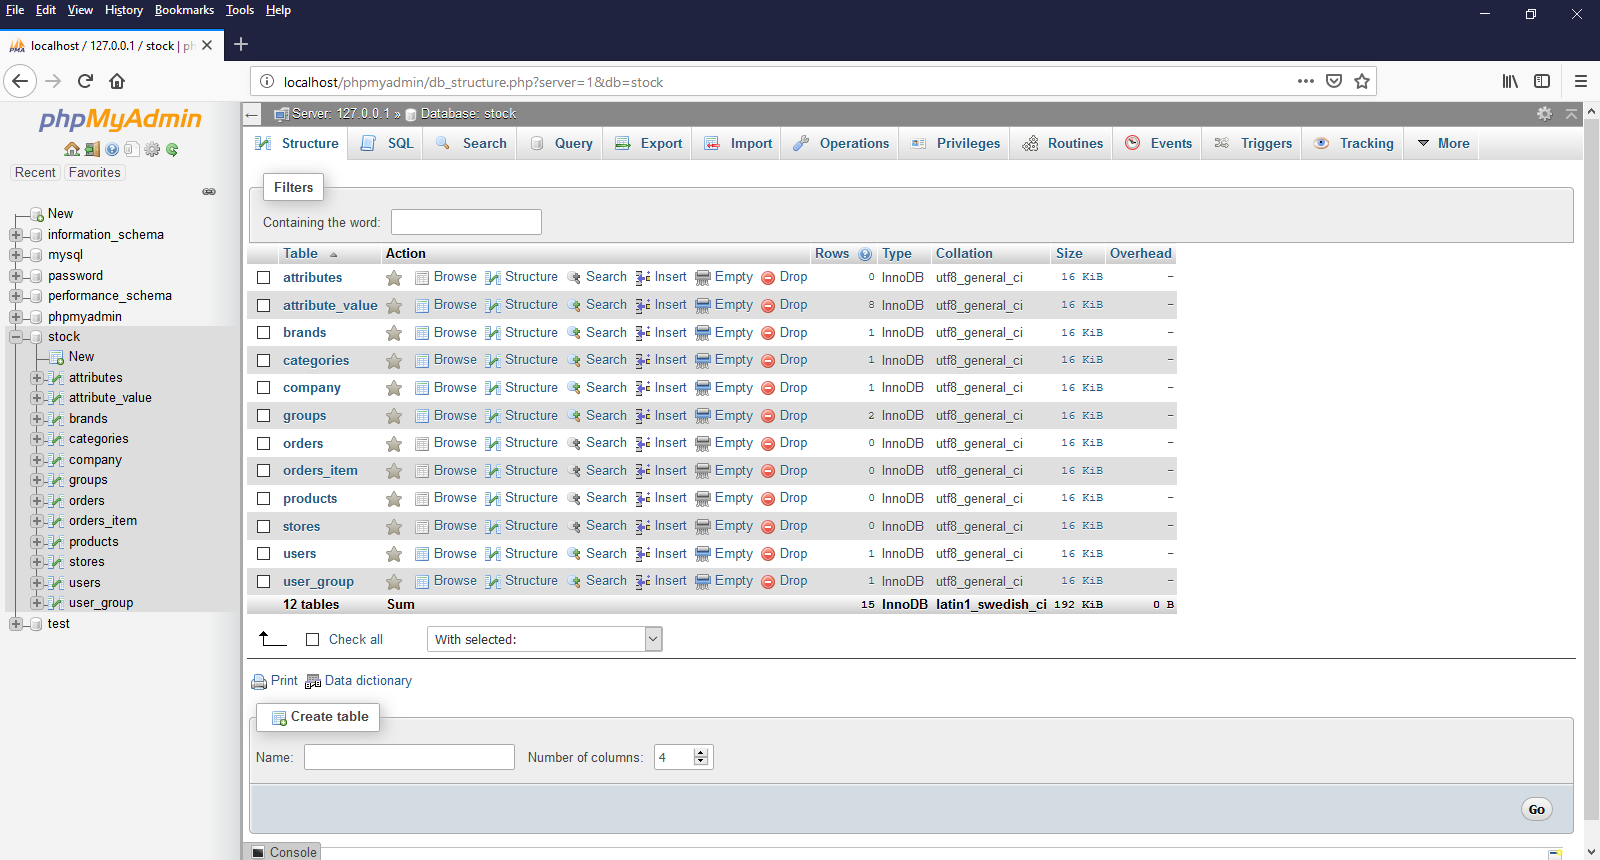
C:\xampp\htdocs\ERP_qubeteck\. - Create the database. Open phpMyAdmin and create a new database named
stock. - Import the schema. Import the
stock.sqlfile into yourstockdatabase. - Run the servers. Start Apache and MySQL from your server control panel (WAMP / XAMPP).
- Open the system. Visit
http://localhost/ERP_qubeteck/in your browser.
Configure the database connection (if needed)
If your database user or password is different (for example a production server), edit application/config/database.php:
$db['default'] = array(
    'hostname' => 'localhost',
    'username' => 'root',
    'password' => '',
    'database' => 'stock',
    'dbdriver' => 'mysqli'
    // ...
);Logging In
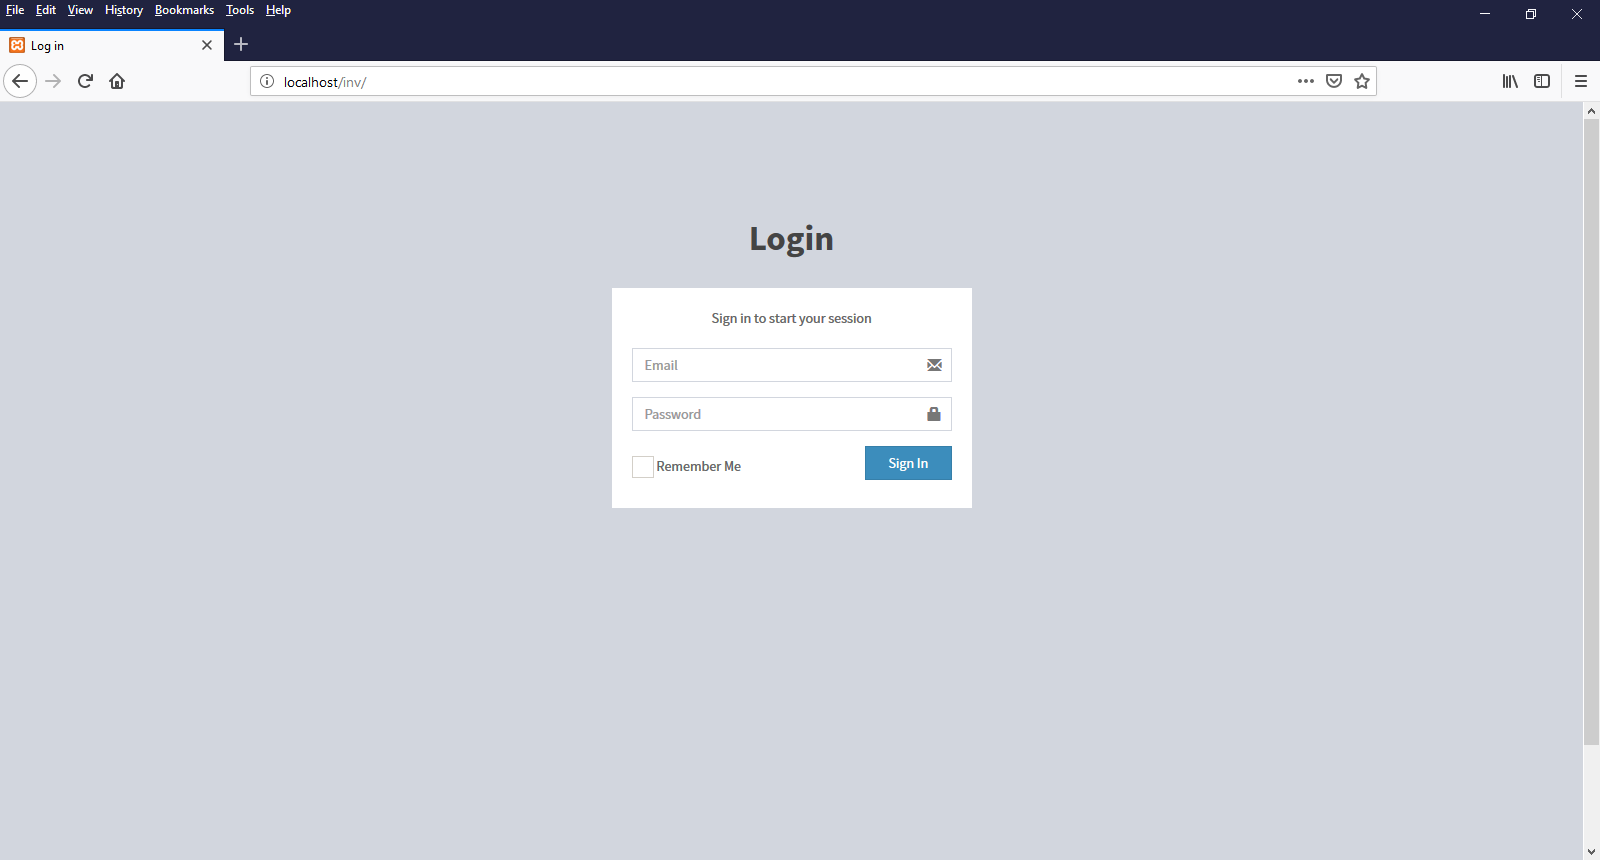
- Open the system URL in your browser (for example
http://localhost/ERP_qubeteck/). - Enter your email and password on the login page.
- Click Login. You will be taken to the dashboard. If you were already logged in, the system opens the dashboard directly.
Email: admin@admin.com
Password: password
# If the site is inside a folder, the URL is:
http://localhost/ERP_qubeteck/auth/login
# Logout:
http://localhost/ERP_qubeteck/auth/logout
2 Dashboard
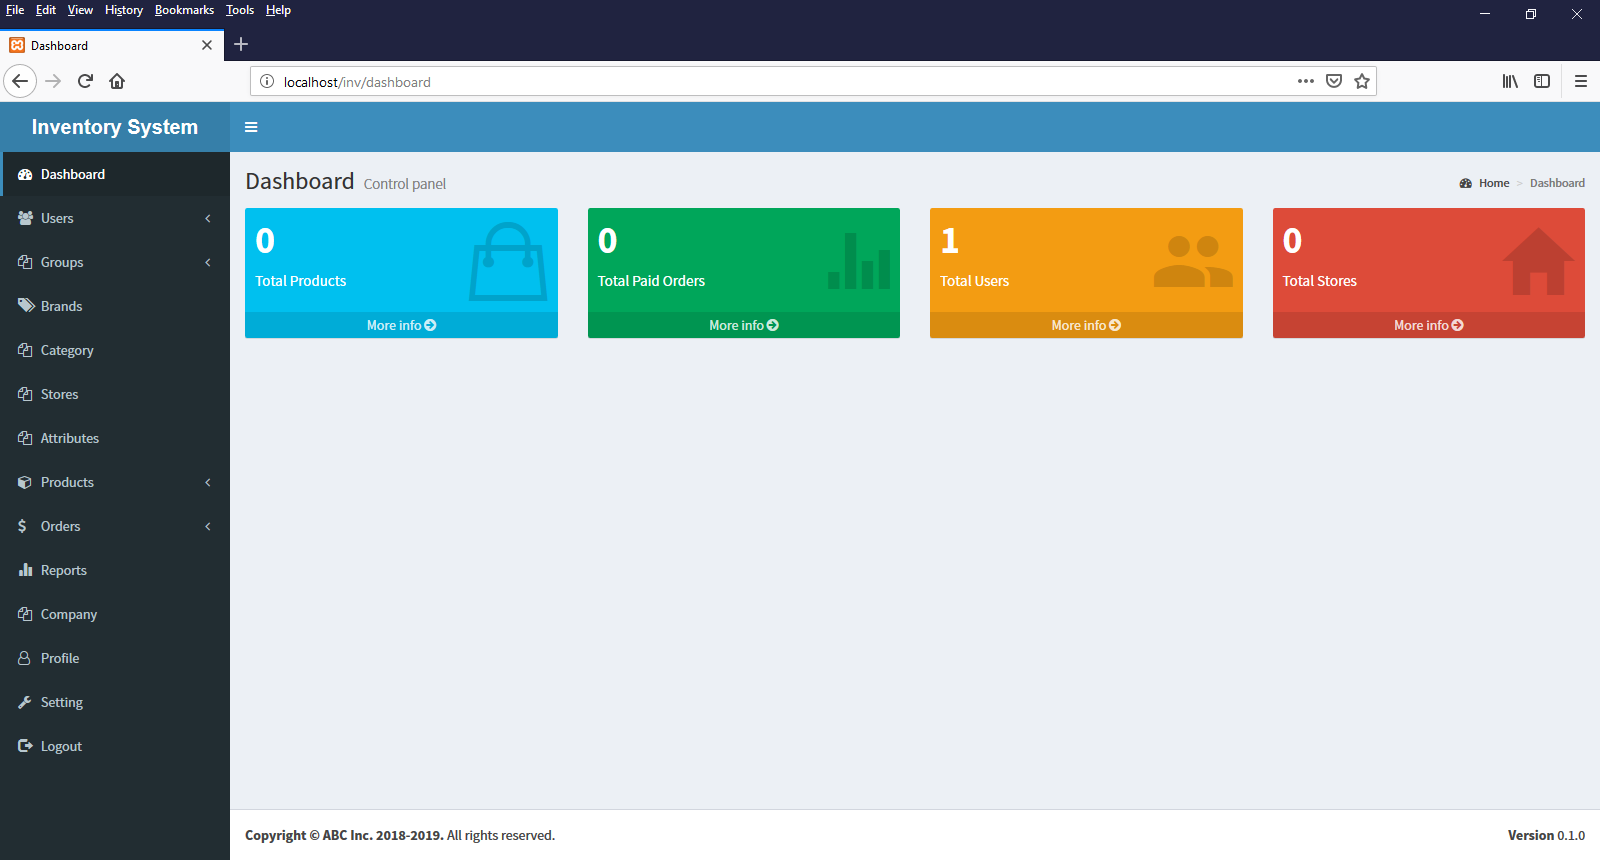
The dashboard is the first screen you see after logging in. It gives an at-a-glance summary of the whole business.
Dashboard widgets
| Widget | Description |
|---|---|
| Total Products | Number of products in the catalog (active and inactive). |
| Total Paid Orders | Orders fully paid by customers. |
| Total Orders | All private/individual orders recorded. |
| Total Organization Orders | All organization (company) orders recorded. |
| Total Loan / Unpaid | Orders still to be paid (credit / arrears). |
| Total Processed / Delivered | Orders that are under process or delivered. |
| Total Users | Number of staff accounts. |
| Total Active Stores | Number of stores (locations) that are active. |
3 User Management
Users are the people who log into the system (owners, cashiers, managers). Each user belongs to one group which decides what they can see and do.
Viewing users
Go to Users → Manage Users. The list shows users in a searchable table with columns for name, phone, gender and actions. The main administrator account (id 1) is never shown in the list and cannot be removed.
Adding a new user
- Go to Users → Add User.
- Fill the form:
- Username — a short unique name used to identify the user.
- Password — stored securely (hashed, never readable in the database).
- Email — used to log in.
- First name / Last name — the staff member's name.
- Phone — contact number (also used if SMS is enabled).
- Gender — Male / Female.
- Group — choose the permission group for this user.
- Click Create. The password is hashed before saving. You will be returned to the user list.
Editing / deleting a user
- Edit: click the Edit icon next to a user, change the details and save. You can also set a new password here — the confirmation field must match.
- Delete: click the Delete icon. Only users with the "delete user" permission can do this.
Profile & Settings (your own account)
- Profile — shows the details of the currently logged-in user. Always available to the logged-in user.
- Settings — lets a user update their own information and change their own password (enter your current password logic: new password + confirmation must match).
4 Roles & Permissions (Groups)
A group is a set of permissions. Instead of giving permissions to each person, you create groups (for example Cashier, Manager, Owner) and assign users to them.
The 36 permissions
Every module has four standard permissions (create, view, update, delete) plus a few special ones. Examples:
| Permission | What the user can do |
|---|---|
| createProduct / viewProduct / updateProduct / deleteProduct | Work with the product catalog. |
| createOrder / viewOrder / updateOrder / deleteOrder | Work with orders and payments. |
| createUser / viewUser / updateUser / deleteUser | Manage staff accounts. |
| viewReports | See sales charts and detailed income reports. |
| updateCompany / updateSetting | Change company settings and system configuration. |
| createCustomer / viewCustomer / updateCustomer / deleteCustomer | Manage organization customers. |
Permissions are checked on every action by the system. Even if a user navigates directly to a URL, they only succeed if their group has the permission.
Creating and managing groups
- Go to Groups → Add Group. Enter a group name.
- Tick the permissions you want this group to have. The list is grouped by module for easy selection.
- Save. The group appears in the group list and can be assigned to users.
You can edit a group's permissions at any time — the change applies to every user in that group immediately.
5 Product Catalog
The catalog holds everything you sell. It is organised with products plus supporting lists: brands, categories, stores and attributes. Products use these lists to describe themselves (a product belongs to a store, can have one or more brands / categories / attributes, and carries its own price and stock quantity).
Brands
Brands are the makers of your products (for example "Habesha", "Rico", "Samsung"). You can mark a brand active or inactive. Use Brands in the menu to add, edit or delete, and to set whether the brand is active.
Categories
Categories group your products into types (for example "Printing", "Stationery", "Clothing"). Manage them under Category. You can activate or deactivate a category, and products keep their category even if a list item is later made inactive.
Attributes
Attributes describe product options in two levels: an attribute (for example "Color" or "Size") and its values (for example Blue, Red / S, M, L). Create an attribute, then open it and click Add Value to add its values. Attribute values are stored with the product record (as JSON) so a product can carry several.
Stores
Stores are your locations or warehouses (for example "Chiro Main Shop", "Store 2"). Each product is assigned to a store. The dashboard shows the total number of active stores.
Products — field by field
| Field | Description |
|---|---|
| Name | The product name shown to customers. |
| SKU | Stock Keeping Unit — a unique code for the product. |
| Price | Selling price in the selected currency. |
| Quantity | Current stock level. Automatically decreased when an order is placed. |
| Image | Product image (GIF / JPG / PNG, max 1 MB). |
| Description | A short description of the product. |
| Brand / Category / Store | Which brand(s), category(ies) and store this product belongs to. Multiple brand / category assignments are supported via JSON. |
| Attribute Value | Optional attribute values selected for this product. |
| Availability | Active (available to sell) or Inactive. |
Adding and managing products
- Go to Products → Add Product.
- Enter the product details (name, SKU, price, quantity, image, description).
- Assign brand(s), category(ies), attribute value(s) and a store.
- Set availability and click Create.
Use Products → Manage Products to view the catalog. The list shows a thumbnail, SKU, name, price, quantity status (with low-stock colouring), store and availability. You can edit or delete products from here.
{
  "color": ["Blue", "Red"],
  "size": ["M", "L"]
}
6 Orders & Sales
Orders are the heart of the system. There are two types: private / individual orders (customer information is typed into the order) and organization orders (linked to a saved customer record). Every order can hold several products, plus optional dimensions, discounts, service charge and VAT.
Order types
| Type | Detail |
|---|---|
| Private / Individual Order | Customer name, address and phone are entered directly on the order screen (menu: "Add Order"). |
| Organization Order | Linked to a saved organization customer — you pick the customer and their details are pulled in (menu: "Add Organization Order"). |
Creating an order
- Choose the order type (Add Order for private, Add Organization Order for organizations).
- Select products. Add products to the order — for each one set the quantity; for measurement-based items (e.g. glass), enter the height and width and the area (kaaree) is calculated automatically.
- Set customer details (name, phone, address) — or pick an existing organization customer.
- Apply charges and discount — service charge and VAT/TOT are calculated automatically from the rates set in company settings. You can also enter a discount.
- Save the order. Stock is reduced automatically for every product sold, and an SMS receipt is sent if SMS is enabled.
12344-0001.Viewing and editing orders
- Manage Orders — lists all private orders (searchable table).
- Manage Organization Orders — lists all organization orders.
- Click Edit to change products, quantities, customer details or discounts. The order and its stock are recalculated.
Payments
Each order has a payment status and a payment history. You can record multiple payments against one order (useful for installments on loans).
| Payment status | Description |
|---|---|
| Paid | The order is fully paid. |
| Advance Payment | Customer paid only part (advance/partial). |
| Loan / Unpaid | No payment yet — a credit/loan order (the dashboard tracks the total loan amount). |
Payment methods: Cash, Bank Transfer, Mobile Transfer, and Telebirr. The order payment screen also lets you enter a Telebirr transaction number; the system can verify it automatically (see Telebirr Verification). When a payment is recorded, an SMS confirmation is sent if SMS is enabled.
payment_types:  0 = Cash
                1 = Bank Transfer
                2 = Mobile Transfer
                3 = Telebirr

paid_status:    0 = Loan / Unpaid
                1 = Paid
                2 = Advance Payment
Order processing workflow
Orders move through three states. Use the Order Process page to update them.
| Step | Description |
|---|---|
| Not Processed | Order received, work not started. |
| Under Process | Work is in progress. |
| Delivered | Order completed and handed to the customer. |
- Open Order Process from the menu.
- Choose an order and set its status (Not Processed / Under Process / Delivered).
- Save. Each status change is recorded with the date, and a status-change SMS is sent to the customer if SMS is enabled.
Printing receipts
Every order can print a receipt/invoice. The receipt is optimized for thermal printers and uses your configured paper size (for example 80 mm wide x 297 mm). It prints automatically when the page opens and is written for your local audience (in Afan Oromo). It shows the bill number, customer, items, gross amount, service charge, VAT, discount and net amount.
Bill No: 12344-0001        Date: 11/09/2026
Customer: Abebe Kebede      Phone: 0912 345 678
-------------------------------------------
Item          Qty   Rate     Amount
Glass 4mm     2     500.00   1,000.00
-------------------------------------------
Gross amount:              1,000.00
Service charge (5%):          50.00
VAT/TOT (15%):               150.00
Discount:                     30.00
NET AMOUNT: 1,170.007 Customers
Customers in this system are organization customers — companies, offices or institutions you sell to. They are linked from organization orders so you do not retype their details every time.
Customer fields
| Field | Description |
|---|---|
| Username | A label for the customer record. |
| Position | The employee position / role of the contact person. |
| Organization Name | The company / organization name. |
| Organization Address | The organization's address. |
| Phone | Phone number — used for SMS and for bill number generation on orders. |
| Customer Type | Distinguishes individual vs. organization customers. |
Managing customers
- Go to Customers → Add Customers and fill the organization details.
- Use Manage Customers to view, edit or remove records.
- Create an organization order and choose the customer — their name and address are reused automatically.
8 Payment Accounts
Payment accounts are the bank and mobile-money accounts where your customers send money. There are two categories: bank (for bank transfers) and telebirr (for Telebirr mobile money).
Account fields
| Field | Description |
|---|---|
| Bank / Provider Name | e.g. Commercial Bank of Ethiopia, Ethio Telecom Telebirr. |
| Account Name | The account holder name. |
| Account Number | The account number; for Telebirr the registered phone number. |
| Account Type | Type/category of the account. |
| Category | bank or telebirr. |
| Is Default | One default account per category — suggested for customers. Only one active default can exist per category. |
| Active | Whether the account can be used. |
- Go to Payment Accounts (Banks). You reach it from the Configuration page → Payment Accounts tab, or the dedicated menu item.
- Add an account choose category (bank or telebirr) and fill the details.
- Mark it as default so it is pre-selected when customers choose how to pay.
9 SMS Notifications
The system can send SMS messages to customers automatically using the Ethiopian GeeSMS gateway. Messages are sent when an order is created, when an order status changes, and when a payment is received.
Setting up SMS
- Get a GeeSMS API token from
geezsms.com/#/api. - Go to System Configuration → Company tab.
- Enable SMS set the API token and (optionally) the shortcode ID.
- Click "Send Test SMS" enter a phone number and a test message to check that the API works.
When SMS is sent
- Order created — confirmation to the customer.
- Order status changed (process step updated).
- Payment received — receipt/confirmation SMS.
Phone numbers are normalised to Ethiopian international format (for example 0911... → 25191...). If an SMS fails (bad credit, offline), the order still succeeds — SMS never blocks a sale.
SMS log
The SMS Log page shows every message sent: order/bill, phone, message text, type (order_created, status_change, payment), delivery status and the raw API response. Use it to diagnose undelivered messages.
POST https://api.geezsms.com/api/v1/sms/send
Headers :  Content-Type: application/json
Body    :  {
             "token": "YOUR_API_TOKEN",
             "to": "251911223344",
             "message": "Your order is ready!",
             "shortcode": "SHORTCODE_ID"
           }
10 Telebirr Payment Verification
When a customer pays with Telebirr, the system can verify the payment automatically by checking the official Ethio Telecom receipt page. This protects you against fake payment screenshots.
How verification works
- Customer pays via Telebirr and shares the transaction number (the 10+ digit TT number).
- Enter the TT number on the order payment screen.
- The system checks the receipt using
transactioninfo.ethiotelecom.etand verifies that:- the transaction was found,
- its status is Completed,
- the payment was made today, and
- the credited account matches one of your configured Telebirr accounts.
- Result is shown — verified, or a reason why not (not found / not completed / wrong account).
found— whether the receipt exists.verified— found + completed + paid today + account matches.account_matches— whether the credited account is in your account list.
Requirements
- An Internet connection from the business server to Ethio Telecom.
- Your Telebirr accounts added in Payment Accounts with category
telebirr.
11 Reports & Analytics
Reports help you understand your income. You get both a visual yearly chart and a detailed, filterable list of every payment.
Monthly income chart
- Shows total sales per month for a chosen year as a bar chart.
- Choose the year from the dropdown (available years are listed automatically).
Sales detail report
- Filter payments by a date range and see each payment record.
- Columns include: bill number, customer name, customer type, datetime, total amount, paid amount, due amount, payment type and payment status.
- Use it to see who still owes money (due amount > 0) and to reconcile cash, transfer and Telebirr payments.
viewReports can open the reports pages.Typical usage
- Open Reports → Income Report for the chart, or Sales Detail for the list.
- Pick the year or date range.
- Review/export — the detail table supports searching, sorting and pagination.
12 Company Settings & Configuration
The System Configuration page is where you customise the whole system for your business. It has several tabs: Company, Payment Accounts, Printer, and Paper.
Company tab
| Setting | Description |
|---|---|
| Company Name | Your business name. |
| Charge Amount (%) | Service charge percentage added on orders. |
| VAT (%) | VAT / TOT percentage added on orders. |
| Address / Phone / Country | Your location and contact details. |
| Message | A personalized message shown on receipts. |
| Website / Facebook / Telegram / TikTok | Your online links. |
| Currency | Currency symbol used across the system (150+ world currencies, e.g. ETB, USD, EUR). |
| SMS Settings | Enable SMS, GeeSMS API token, shortcode ID, and Send Test SMS button. |
Printer tab
Choose the receipt printer type used in the shop.
Paper tab
Set the paper width and height in millimetres. Typical thermal receipt paper is 80 mm wide (receipts print to this exact width).
Thermal receipt paper :  width 80 mm,  height 297 mm
A4 invoice paper : width 210 mm, height 297 mm13 Frequently Asked Questions (FAQ)
Quick answers to the most common questions. If your question is not here, use the feedback form or contact us.
viewReports unticked, then assign that group to the user in Users.Advance Payment for partial or Loan / Unpaid for credit. You can add multiple payments later (installments). The dashboard shows total outstanding loans.admin@admin.com and password password. Change this password immediately after the first login on a live system.updateCompany or updateSetting permissions can open System Configuration.14 Troubleshooting
Common problems and how to fix them.
- Check Apache is running in WAMP/XAMPP.
- Check the URL matches your project folder name (e.g.
http://localhost/ERP_qubeteck/). - Enable mod_rewrite in your Apache config; the system uses the bundled
.htaccess. - Check the MySQL database "stock" exists and was imported.
upload_max_filesize in php.ini).transactioninfo.ethiotelecom.et. If the customer paid before midnight, it will not pass the same-day check today.application/config/database.php for the correct hostname, username, password and database name. On large databases, keep the number of open browser tabs low.15 Updates & Changelog
This section is updated whenever the system changes. It keeps you informed about new features, improvements and bug fixes.
First release NEW
- User management with permission groups (36 permissions).
- Product catalog: products, brands, categories, stores, attributes.
- Private and organization orders with multi-item baskets, dimensions (height × width), service charge, VAT/TOT and discount.
- Automatic stock management and low / out-of-stock warnings.
- Payments: cash, bank transfer, mobile transfer, Telebirr; advance and loan statuses; payment history with installments.
- Telebirr receipt verification against Ethio Telecom.
- SMS notifications via GeeSMS with full log.
- Order processing workflow (not processed / under process / delivered).
- Thermal receipt printing with configurable paper size (e.g. 80 mm).
- Reports: monthly sales chart and detailed sales report.
- Company settings: currency, VAT, service charge, social links, SMS.
- This multi-language documentation site (EN, AM, OM, TI, SO, HAR).
16 Privacy Policy
Last updated: 2026
1. Who we are
This documentation and the SOORA ERP system are provided by the business running the system (your company). This policy explains how the system handles information.
2. Information the system stores
- Account information — usernames, email addresses, names, phone numbers and password hashes of staff users.
- Business data — products, orders, customers, payments and reports entered while using the system.
- Customer contact details — names, addresses and phone numbers of individuals and organizations you sell to.
- SMS data — for numbers enabled for SMS, message logs (order, status and payment notifications) retained for delivery tracking.
3. How information is protected
- Passwords are stored with strong, one-way hashing (bcrypt). No plain-text passwords are kept, and nobody, including administrators, can read them.
- Access to each area is controlled by permissions set per user group.
- The system runs on your own server, so your data stays on your infrastructure and under your control.
4. Data sharing
The system shares only what is necessary to provide its functions: SMS messages are sent through the GeeSMS gateway; Telebirr verification queries Ethio Telecom's receipt service with the transaction number you provide. Data is not sold to third parties.
5. Data retention and your rights
Data is retained as long as your business needs it. As a business owner you may export or delete business records at any time. Employees and customers should contact the business operating the system to request access, correction or deletion of their personal data.
6. Changes to this policy
We may update this policy as the system grows. The latest version is always published here with a revision date.
17 Terms of Service
Last updated: 2026
1. Acceptance of terms
By accessing or using the SOORA ERP system and this documentation, you agree to these Terms of Service. If you use the system on behalf of an organization, that organization agrees to the terms too.
2. Licence
The SOORA ERP software is licensed under the MIT License. You are free to use, modify and distribute it, provided the copyright and permission notices are preserved. This documentation may be used as a reference for your users of the system.
3. Accounts and responsibilities
- You are responsible for safeguarding your login details and for all activity under your account.
- Administrators are responsible for assigning appropriate permissions and for managing staff accounts.
- You must enter accurate information when creating orders, products and customers.
4. Acceptable use
- Use the system only for its intended business purposes.
- Do not attempt to access areas or data you are not permitted to access.
- Do not upload harmful files, or use the system to break any law.
5. Availability and liability
The system is provided "as is" and "as available". While we work to keep it reliable, we do not guarantee uninterrupted availability. To the fullest extent permitted by law, we are not liable for indirect or consequential losses arising from the use of the system. Always keep backups of your database.
6. Changes
We may update these terms from time to time. Continued use of the system after changes means you accept the updated terms.
18 Contact & Support
Need help with using the system? Start with your administrator or the FAQ. For help with the system itself, installation, or the documentation, contact the business that runs it using the details below.
support@yourcompany.com
For questions and support requests.
Phone
+251 900 000 000
Business hours: Monday–Saturday.
Address
Your Business, Chiro, Ethiopia
Website & social media
www.yourcompany.com • Telegram • Facebook • TikTok
19 Feedback & Issue Reporting
Your suggestions help us improve. Use the form below to ask a question, suggest an improvement, or report a problem you found while using the system.